
How To PhotoGRAPH Old Plans
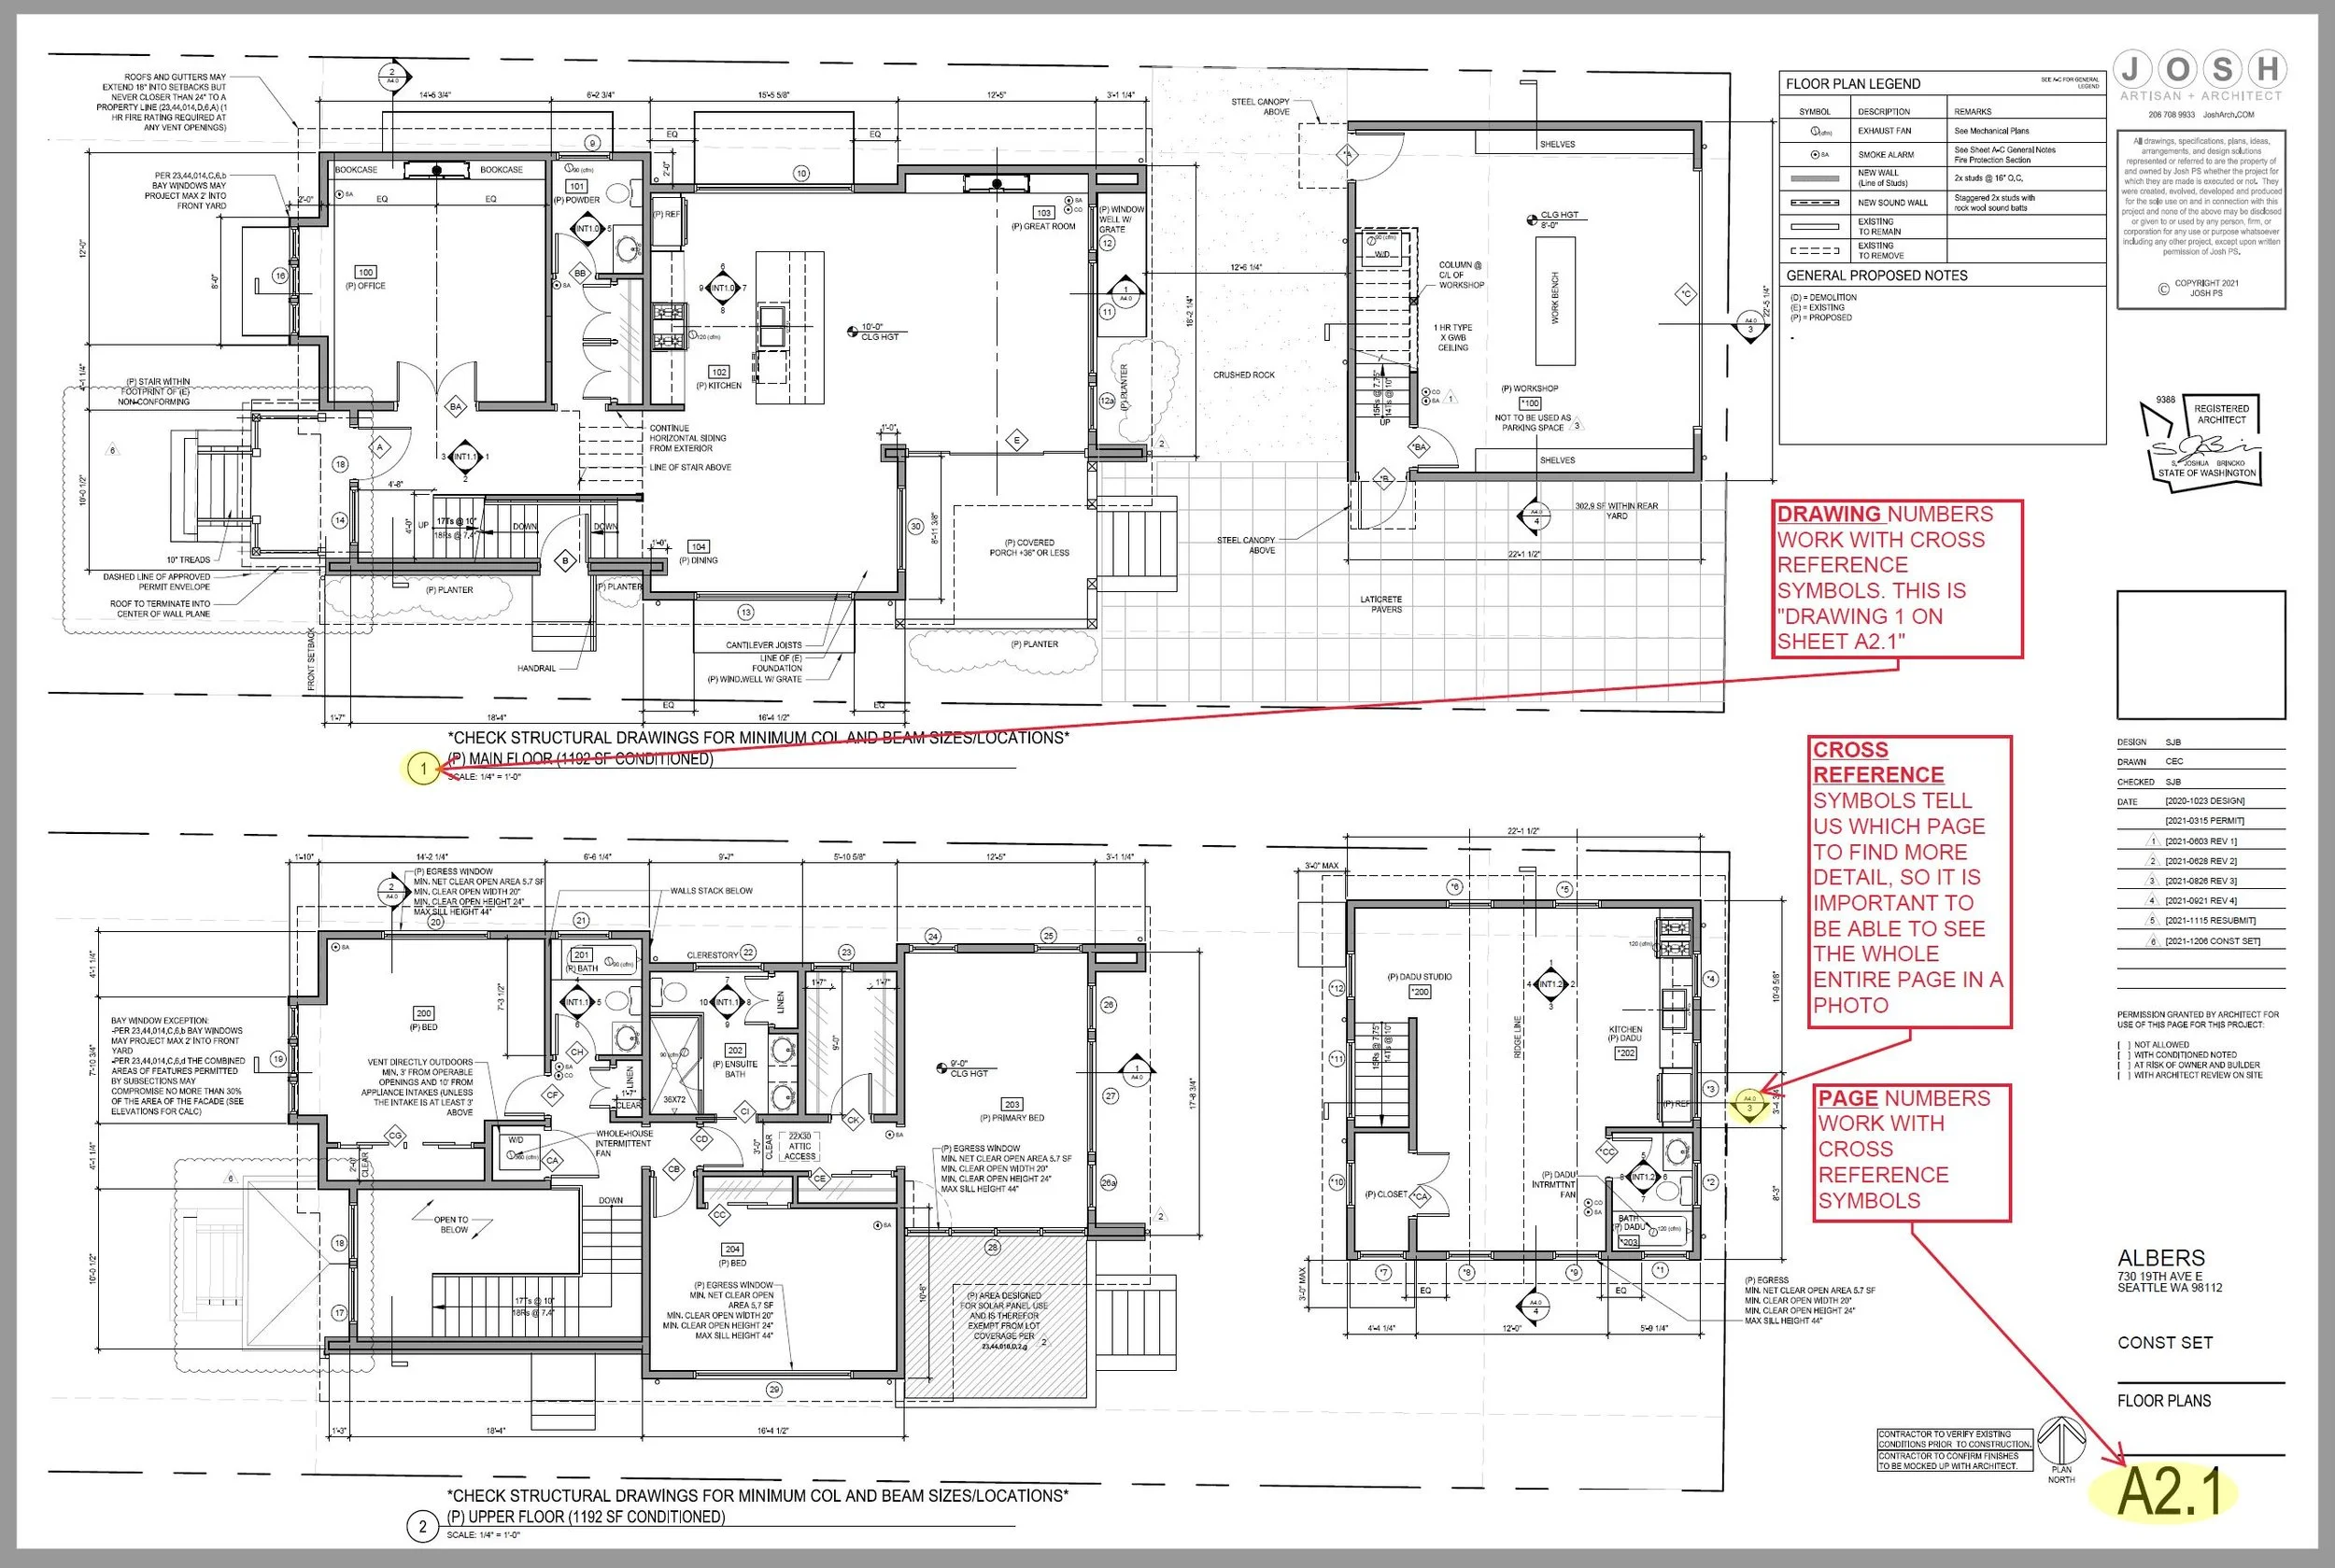
The red text above explains why photos of an entire drawing page is required.
Here’s what you need to know…
On many remodel or addition projects, drawing the existing house is a significant amount of the work that needs done. In order to draw new stuff, we need to first draw the old stuff. This is also required by the building department, it’s needed by the structural engineer, and it gives us the context we need to design the project. If you have access to the old drawings of your house, this will save you tons of money since we won’t have to waste time (your money) to measure and redraw every aspect of the house. These old drawings are not always accurate, but they are a great starting point that will save time. During the course of design, accuracy is not needed in every area of the project. Once we get into the design process further, and really hone in on the scope of work, we will determine if any areas need to be measured more precisely.
Why is this important…
Notice how the image above includes THE WHOLE ENTIRE PAGE in the photo. It is not a small part of the page. It is the whole thing. None of the page is cropped off. This is very important since we need to see all of the page numbers, drawing numbers, and cross reference numbers on the same photograph.
How to photograph old plans…
*FYI, they aren’t called “blueprints” unless they are old hand-drawn plans on blue paper with white lines from like 100 years ago…I’ve never actually seen blueprints except in a museum :)
If you already have a PDF file of your existing plans, you can skip the steps below and just email it to us. To be even more helpful, you can ask the previous architect, engineer, surveyor, etc to send us the autocad (.dwg) file of those plans. Sometimes they are reluctant to give them away, but if you let them know “your nephew needs a CAD file for a school project,” or something like that, they will likely send them right over to you, so you can send them to us :)
If you don’t already have digital files, take a photo of your old plans like the image and video above. The first thing you need to do is to get the drawings to lay flat. 99% of the time, people roll up their drawings wrong, and they curl up on themselves (which makes it really challenging to lay them out flat on a table). Start by rolling up your drawings with the DRAWINGS FACING OUT. This makes it possible to thumb through the pages without unrolling the drawings, and it enables the drawings to lay flat on a table. Trust us on this. And no, the drawings won’t get ruined if the images are facing out. Roll them up the correct way, and by tomorrow, they should be “trained” to lay flatter.
Now that the plans will lay flat, you need good light for photos to be clear. The best light is natural light. If it is dry outside, lay your drawings on the driveway or on the hood of the car. If they are still curling, lay something on the corners to keep them flat, but don’t cover up the page number. If it’s not dry outside, you can setup a few lamps to shine on the drawing, but the key is to ensure you don’t have shadows on the drawings. If the light is dim, or if there’s shadows, we will have a lower chance of being able to read the drawings.
Now that you have good light, you need to know how to properly work your camera on your phone. Start by wiping off the camera lens to ensure it is clean. Smudges causes the camera not to focus properly. Next, stand directly over top of the drawings, ensure there’s no shadows (much easier outside in natural light), and tap the center of your phone’s screen. This focuses the camera where you tap. THEN, you can snap the photo. Repeat this for every page, and ensure you don’t crop off the edges of the pages. Also, it is helpful if you arrange the pages in order of their page number. To reiterate: DO NOT CROP OUT ANY PART OF THE PAGE FROM YOUR PHOTO. WE NEED TO BE ABLE TO SEE THE ENTIRE PAGE IN THE PHOTO.
Once you have all the photos on your phone, next you need to email them to us at office@josharch.com. It is ideal if you send them at the highest image size. Attach them in an email. Every phone is different, but generally, near the subject line of your email app, there is something to click on where you can select the “image size.” Select the highest setting or “actual size.” On some phones, there’s no settings to select, but it will prompt you with that choice after you hit the send button. Sometimes, you may need to go into the settings of the phone to find preset options for this - or it may default to just sending the highest quality version. We will let you know if your images are unreadable. If the files are too large to send all in the same email, then it’s ok to send them in separate emails. If you are tech-savvy, save your photos as a PDF, combine them all as one single PDF, arrange them in order by page number, and email us that file … this is ultimately what we will end up spending time to do if you are unable to do it yourself (and we bill for our services by the hour, so it’s a chance for you to save money).
If all else fails, you can drop off your plans at Digital Reprographics in Bellevue, and ask them to scan the files and email them to office@josharch.com. They also do a delivery service if you don’t want to bother with driving around town. OR you can just ask us to do this on your behalf.